On this page
Product specifications
Measurements
Measurements (box)
Specifications
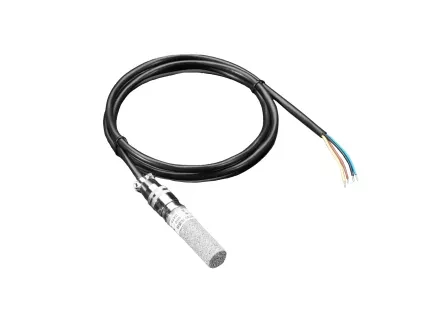
The PIERRE Pro Temperature and Humidity Sensor with ModBus operates on 5-24V DC, measuring temperatures from -40°C to 120°C. It integrates seamlessly into PIERRE Smart Home System via Modbus, allowing centralized control and real-time monitoring. The sensor continuously measures environmental temperature and humidity, communicating the data via the Modbus protocol for centralized control.
Its waterproof design ensures reliable performance in outdoor or demanding conditions. Multiple mounting options make installation flexible, optimizing environmental management for both indoor and outdoor spaces.
Print user manual for Temperature and Humidity Sensor with ModBus
- W: 14 mm
- H: 87 mm
Power supply mode
DC 5-24V
Connectivity
Modbus
Product color
Black
Built-in Sensors
Temperature, Humidity
Operating Temperature °C
-40°C ~ +120°C
Operating Temperature °F
-40°F ~ +248°F
Operating Humidity % RH
0% - 100% RH
Temperature detection accuracy
±0.20°C
Humidity detection accuracy
±3.00%
Safety features
Overload, Short Circuit, Reverse polarity, Anti-Flammable Housing, Static Protection, Surge Protection
IP rating
IP20
- Connect the adapter’s VCC terminal to the +5V output of the Pierre controller.
- Connect the adapter’s GND terminal to the 5V GND terminal of the controller.
- Connect the A+ terminal on the adapter to the A+ (RS485) terminal on the controller.
- Connect the B− terminal on the adapter to the B− (RS485) terminal on the controller.
- Connect the sensor’s VCC wire to the adapter’s VCC terminal.
- Connect the sensor’s GND wire to the adapter’s GND terminal.
- Connect the sensor’s TXD wire to the RXD terminal on the adapter.
- Connect the sensor’s RXD wire to the TXD terminal on the adapter.
- Choose Controller
- Tap on the Controller that you would like to add new I/O to.
- To edit the I/O, click on the Controller to which the I/O is added.
- Configurable I/O - list
- Tap on the Configurable I/O tab.
- Add button - Configurable I/Os
- Tap on the Add button.
- Choose type - Configurable I/O list
- You should choose the type of the I/O from the list that you would like to add.
- New Temperature sensor - DS18B20
- Fill the following form:
- Name - Write the name of the Temperature sensor.
- Roles - Select the Role from the list.
- Pin - Choose Pin. It is physical place on the Controller where I/O is connected to it.
- Identifier - Enter the identifier of the I/O in the electrical project in this field.
- Address - Tap on +/-.
- To confirm your choice tap Submit and Save.
- Fill the following form:
- Select Roles
- You can select desired Role or Roles - multiple choice if you tap on the checkboxes next to them.
- Tap on Save/Done.
- Choose PIn
- Tap on the radio button next to the Pin that you would like to choose.
- To confirm selection tap on Save/Done.
