On this page
The PIERRE Controller Lite is a streamlined version of the PIERRE smart home control system, designed to manage various smart devices with a focus on efficiency and simplicity.
- 16 Digital Inputs and Outputs - Provides robust integration capabilities with sensors, buttons and actuators.
- Ethernet and 2.4 GHz Wi-Fi Support - Allows for flexible networking options similar to the Pro model.
- Durable Construction - Features a 12V DC power input and overvoltage protection for long-term reliability.
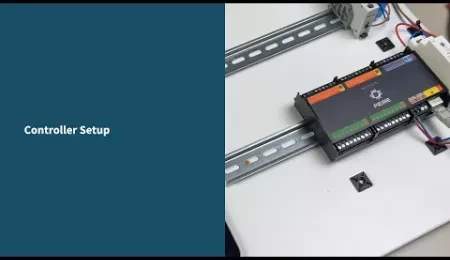
- DIN Rail Mounting - Easy to install in various setups, offering a practical installation solution.
- PIERRE Partner App - Simplifies configuration by enabling users to manage multiple controllers, assign specific functions, and automate devices like lights, blinds, or sensors with ease.
- Compact Design - Offers many essential features of the Pro version in a more compact and efficient design, making it ideal for smaller setups or focused automation needs.
Description of the PINs on the Controller:
- INPUT from 1 to 16 ports - INPUT for sensor wires and buttons
- Power supply for the sensor
- PLUS - MINUS connection to a voltage of 12 V
- PLUS - MINUS connection to a voltage of 5 V
- ETH: Connecting to the network
- Reset button
- OUTPUT - from 1 to 16 ports: OUTPUT to wire the corresponding actuator device that will activate when it receives input from the sensors, buttons, smartphone, display or automation.
- GRD - Ground wire (-)
- A combination of digital inputs or outputs
- Digital input - 2 ports used only for RFID communication (Wiegand 34bit)
- AP - access point - It is a working mode used for the initial setup of the controller and for modifying configuration settings later while the controller is in operation.
- LED - indicator of network connection-It provides essential information about the controller’s current status, making it easy to monitor its connection, operation mode, and maintenance activities.
Here is a list of the colors that shows different statuses of the Controller:
- Green – Online -The controller is online and connected to the network, functioning as expected.
- Red – Offline - The controller is offline, indicating a disconnection from the network or that there is no internet access.
- Light Blue – AP Mode:
The controller is in Access Point (AP) Mode, meaning it is broadcasting its own network, allowing devices to connect directly to the controller for setup or configuration. - Dark Blue – AP Mode with Pierre Partner: The controller is in AP Mode, and it is actively being managed through the Pierre Partner system. This mode is used for more advanced setup or partner-level configuration.
- Purple – Searching for IP Address: The controller is attempting to obtain an IP address from the router or network. It is searching for an internet connection.
Orange – Firmware Update: The controller is in the process of downloading a firmware update, ensuring that the system stays up-to-date with the latest software and features.
GOOD TO KNOW: If one Input has influence on the Output they both should be added to the same Controller. For example in situation when RFID reader opens the door, they should be add to the same Controller for best performances.
Pierre Controller Commissioning
Overview
This document provides the procedure for commissioning a new or existing controller within the Pierre Partner application. The commissioning process enables the seamless integration of controllers into your building system by allowing the setup of various network and I/O configurations. This includes both new controller setups and restoring or copying settings from existing controllers.
Commissioning Process
Commissioning mode is indicated by WHITE LED light on the controller.
1. Powering On a New Controller
- Automatic Commissioning Mode: When you power on a new controller, it automatically enters commissioning mode.
2. Commissioning Mode for Existing Controllers
- Entering Commissioning Mode: For an existing controller, enter commissioning mode by holding the "AP" button on the controller until the device enters setup mode.
3. Scanning for Controllers
- Pierre Partner App: In the Controllers screen of the Pierre Partner application, the system automatically scans for controllers in commissioning mode.
- If the scanned controller is not present in the current building (meaning it has not been previously created), it will appear as "New Controller - $controllerChipID" with a blue Bluetooth icon. When you click on the new controller, a modal will appear with three options:
New Controller
Copy Existing Controller
Restore Controller
- If an already configured controller in commissioning mode is detected in the building, it will display with a blue Bluetooth icon. When you click on the controller, a modal will appear with three options:
Edit Controller Settings
Edit Network Settings
Restore Controller.
New Controller Setup Options
A. New Controller
- Selection: When you select New Controller, a new modal appears with the following configuration fields:
- Name: Enter a name for the controller.
- Connection Type: Choose between Ethernet or Wi-Fi.
- If Wi-Fi is selected, the Wi-Fi picker will display all available networks. If a password-protected Wi-Fi is selected, a password field will appear.
- IP Settings:
- Choose between Automatic (DHCP) or Static IP.
- If Static IP is selected, the following fields will be available for configuration:
- IP Address
- Gateway
- Subnet
- DNS
- Save: After filling out all required details, click Save. This will create the controller and stop the commissioning process on the device.
B. Copy Existing Controller
- Selection: Selecting Copy Existing Controller opens a modal displaying all available controllers across all buildings.
- Select Controller: Choose an existing controller to copy its settings. When you select a controller, a new modal appears with the following configuration fields:
- Name: Enter a name for the controller.
- Roles: Select the role for the new controller.
- Connection Type: Choose between Ethernet or Wi-Fi.
- If Wi-Fi is selected, the Wi-Fi picker will display all available networks. If a password-protected Wi-Fi is selected, a password field will appear.
- IP Settings:
- Choose between Automatic (DHCP) or Static IP.
- If Static IP is selected, the following fields will be available for configuration:
- IP Address
- Gateway
- Subnet
- DNS
- Setup Copy: The new controller will inherit all settings from the selected controller, including:
- I/O Settings
- Automations: For example, if the copied controller has a door sensor linked to a light (automation: when the door opens, the light turns on), these settings will be replicated on the new controller.
C. Restore Controller
- Selection: Selecting Restore Controller opens a modal displaying all controllers across all buildings.
- Choose Controller: Select the controller to restore. When you select a controller, a new modal appears with the following configuration fields:
- Connection Type: Choose between Ethernet or Wi-Fi.
- If Wi-Fi is selected, the Wi-Fi picker will display all available networks. If a password-protected Wi-Fi is selected, a password field will appear.
- IP Settings:
- Choose between Automatic (DHCP) or Static IP.
- If Static IP is selected, the following fields will be available for configuration:
- IP Address
- Gateway
- Subnet
- DNS
- Connection Type: Choose between Ethernet or Wi-Fi.
- Controller Replacement: This option replaces the chipID of the selected controller with the new one. The controller will adopt the same setup as the original controller.
- Example: If a controller is damaged (e.g., by flood), a new controller can be restored to act as the previous one without reconfiguration.
Existing Controller in Commissioning Mode
A. Edit Controller Settings
- Functionality: This option allows you to edit the controller’s settings. It is the same as the modal opened while holding the controller component, with the additional option to delete the controller which is available only while controller is in commissioning mode.
B. Edit Network Settings
- Network Type: You can switch between Ethernet and Wi-Fi.
- Wi-Fi Network: You can change the Wi-Fi network and re-enter any required credentials.
- IP Settings: Modify the IP Address, Gateway, Subnet, and DNS as needed.
C. Restore Controller
- Restore Configuration: This option will resend the configuration to the commissioning controller. It is useful if configuration fails or if commissioning a new controller fails for some reason.
- No Controller Selection: Unlike Restore Controller for a new controller, here you do not need to select another controller. The system will resend the configuration to the currently commissioning controller.


| Position | Wires | Diameter | Type | Comment |
|---|---|---|---|---|
| From Power supply to Controller | 2 | 0.75 mm² | PP/J | 12V, GND, DC |
What color mean what on Controller LED?
Green – Online:
The controller is online and connected to the network, functioning as expected.
Red – Offline:
The controller is offline, indicating a disconnection from the network or that there is no internet access.
Light Blue – AP Mode:
The controller is in Access Point (AP) Mode, meaning it is broadcasting its own network, allowing devices to connect directly to the controller for setup or configuration.
Dark Blue – AP Mode with Pierre Partner:
The controller is in AP Mode, and it is actively being managed through the Pierre Partner system. This mode is used for more advanced setup or partner-level configuration.
Purple – Searching for IP Address:
The controller is attempting to obtain an IP address from the router or network. It is searching for an internet connection.
Orange – Firmware Update:
The controller is in the process of downloading a firmware update, ensuring that the system stays up-to-date with the latest software and features.
These LED color indicators provide essential information about the controller’s current status, making it easy to monitor its connection, operation mode, and maintenance activities.
What is the difference between the two Controllers?
The main difference between Pierre Pro and Pierre Lite Controllers lies in their software capabilities. The Pro Controller supports Modbus integration, allowing for more advanced communication with connected devices.
How do I add a Controller in the PIERRE Partner (PP) app?
To add a Controller in the PIERRE Partner (PP) app, follow the steps provided in the app's onboarding process, ensuring the controller is connected to the network.
Can the Controller connect via LAN or Wi-Fi?
All PIERRE Controllers can connect via both LAN and Wi-Fi, providing flexible installation options.
How do Controllers communicate when multiple Controllers are used in a project?
Multiple Controllers communicate through the network, either wired (LAN) or wirelessly (Wi-Fi).
Is a Controller necessary to have a smart system?
The wireless Wave system does not require a Controller, as a Wave gateway or display will suffice. However, the wired Pro system requires a Controller for operation.
What are configurable IOs?
Configurable IOs are input/output ports on the PIERRE Controller for analog communication with connected devices, such as temperature sensors or lighting controls.
What happens if the internet goes down?
The system will continue to function locally without internet access, but remote access (such as controlling devices from a phone while away) will not be possible.
How should the control wiring be configured?
The PIERRE system uses star wiring, meaning all devices to be controlled need to be connected to a central location – the distribution box of the PIERRE Controllers. The distribution box can be separated from high-voltage wiring or combined with it. In some cases, there will be separate star points per floor, with each floor having its own PIERRE distribution box. These boxes are all connected to the internet, ensuring full system integration and control.
How big does the distribution cabinet need to be?
There are multiple options for configuring the distribution cabinet. High- and low-voltage devices can be housed in the same cabinet or separately. PIERRE Controllers require an internet connection, so a network switch will also need to be installed. This can be placed inside the distribution cabinet or in a separate multimedia box.
Lights, switches, and other devices except for sockets will be connected in a star pattern, but where should the star point be? Room-by-room, or can everything be in the house’s distribution cabinet?
The PIERRE system uses star wiring, meaning every device to be controlled must be wired to a central location – the distribution box of the PIERRE Controllers. This box can be separated from high-voltage wiring or combined with it. In some cases, star points are created per floor, with each floor having its own PIERRE distribution box. These boxes are all connected to the internet, ensuring complete system integration and control.
How should the lighting be wired?
For lighting, each fixture to be switched separately must have its own wire. If multiple lights are on the same circuit, they can be connected and controlled by a single switch. All wires must be connected to the PIERRE distribution box. The switch wires must also be wired directly to the PIERRE distribution box.
How should the Blinds be wired?
Each Blind motor should have a dedicated wire to the PIERRE distribution box, and each switch must also have a direct wire to the PIERRE distribution box.
How do I add an older version (SmartConfig) of Pierre Controller to the building? What steps should I follow?
- Connect to a 2.4 GHz Wi-Fi network: Ensure your phone is connected to the same Wi-Fi network to complete the process successfully.
- Make sure the controller is powered and connect the Ethernet cable.
- Create a new building in the Partner Application.
- Add the Pierre Controller.
- Enter the password for the 2.4 GHz Wi-Fi in the appropriate field.
- Add the Controller.
- Once the controller appears in the Partner Application, do not disconnect it from the network immediately so it can complete the necessary firmware installation.
For more information please visit: Pierre Controller Activation (Smart Config)
What should you do if the controller does not appear during the scan?
If the controller does not appear in the scanning process, ensure it is in commissioning mode (for existing controllers, hold the "AP" button to enter the mode).
What should you do if the controller cannot connect to the Wi-Fi or Ethernet network?
If the controller cannot connect to the Wi-Fi or Ethernet network, verify the network credentials and IP settings (DHCP or static).